
Knife Sharpening Guide for Damascus Steel Knives
A dull kitchen knife slows even the most skilled chef, but a properly sharpened Damascus steel blade transforms meal prep into pure precision. Professionals and passionate home cooks across the United States know maintaining these premium knives is both an art and a science. By understanding the importance of the right sharpening tools, the proper angles, and careful technique, you can enjoy razor sharp performance and lasting durability from your prized Damascus steel collection.
Table of Contents
- Step 1: Gather The Right Sharpening Tools
- Step 2: Prepare Your Damascus Knife Properly
- Step 3: Select The Best Sharpening Angle
- Step 4: Use The Sharpening Stone Effectively
- Step 5: Check And Refine Your Knife’s Edge
Summary of Key Insights
| Insight | Explanation |
|---|---|
| 1. Invest in the Right Stones | Start with a 1000/6000 combination stone and an 8000 grit finisher to adequately cover most sharpening needs without excess equipment. |
| 2. Maintain a Consistent Angle | Sharpen Damascus steel knives at a 15 to 20 degree angle for optimal sharpness and durability, ensuring consistent results throughout the process. |
| 3. Use Proper Prep Techniques | Thoroughly clean and inspect your blade before sharpening to ensure the best results and prevent damage during the process. |
| 4. Check Edge Sharpness After Stropping | Always perform a sharpness test using the paper test after sharpening and again after stropping to assess improvements in cutting performance. |
| 5. Work Deliberately and Smoothly | Focus on your technique during strokes to build muscle memory, which helps achieve a well-sharpened edge that performs effectively. |
Step 1: Gather the Right Sharpening Tools
Before you sharpen a single Damascus steel blade, you need the correct equipment. The right tools make the difference between a knife that holds a razor edge for months and one that dulls within weeks. Damascus steel demands precision and care, which means your sharpening setup matters as much as your technique.
Start by understanding what you’re working with. The foundation of any solid sharpening arsenal begins with whetstones, which come in different grits. The process of making a knife sharp involves grinding the blade against a hard, rough surface, and the grit selection determines whether you’re removing damage or refining the edge. For Damascus steel knives, you’ll want a coarse grit stone (around 1000 to 3000 grit) for addressing chips and maintaining the blade after heavy use. A medium grit stone (4000 to 6000 grit) handles regular maintenance and honing. The finer grits (8000 grit and above) polish the edge to that mirror finish that makes Damascus steel so visually striking. Many home cooks start with just two stones, typically a 1000/6000 combination stone and an 8000 grit finisher. This setup covers nearly all your sharpening needs without overwhelming you with equipment.
Beyond whetstones, a leather strop should be part of your regular maintenance routine. A strop doesn’t actually sharpen a dull blade, but it realigns the edge between sharpenings and keeps your knife performing at its peak. You’ll also want a honing oil or water, depending on your stone type. Natural whetstones typically prefer water, while some synthetic stones work with either. A wooden or bamboo sharpening stone holder prevents your hands from slipping during the sharpening process and protects you from cuts. Some craftspeople prefer a simple damp towel under their stone, but a dedicated holder offers better stability.
The angle at which you sharpen directly affects how long your edge lasts and how sharp your knife becomes. Damascus steel blades typically perform best at a 15 to 20 degree angle per side. An angle guide or honing steel can help you maintain consistency if you’re new to sharpening. Many professionals use nothing but muscle memory and feel, but if you’re building your skill, a simple guide brackets onto your stone and shows you exactly where to position the blade.
When selecting stones, natural options like Japanese whetstones are prized for their consistency and the feel they provide during sharpening. Synthetic stones cost less and often last longer, making them excellent for someone building their toolkit. For Damascus knives specifically, avoid anything overly aggressive or you risk damaging the pattern and the carefully layered structure that makes these blades special. Quality matters here, and bargain stones often shed particles that scratch your blade rather than sharpen it.
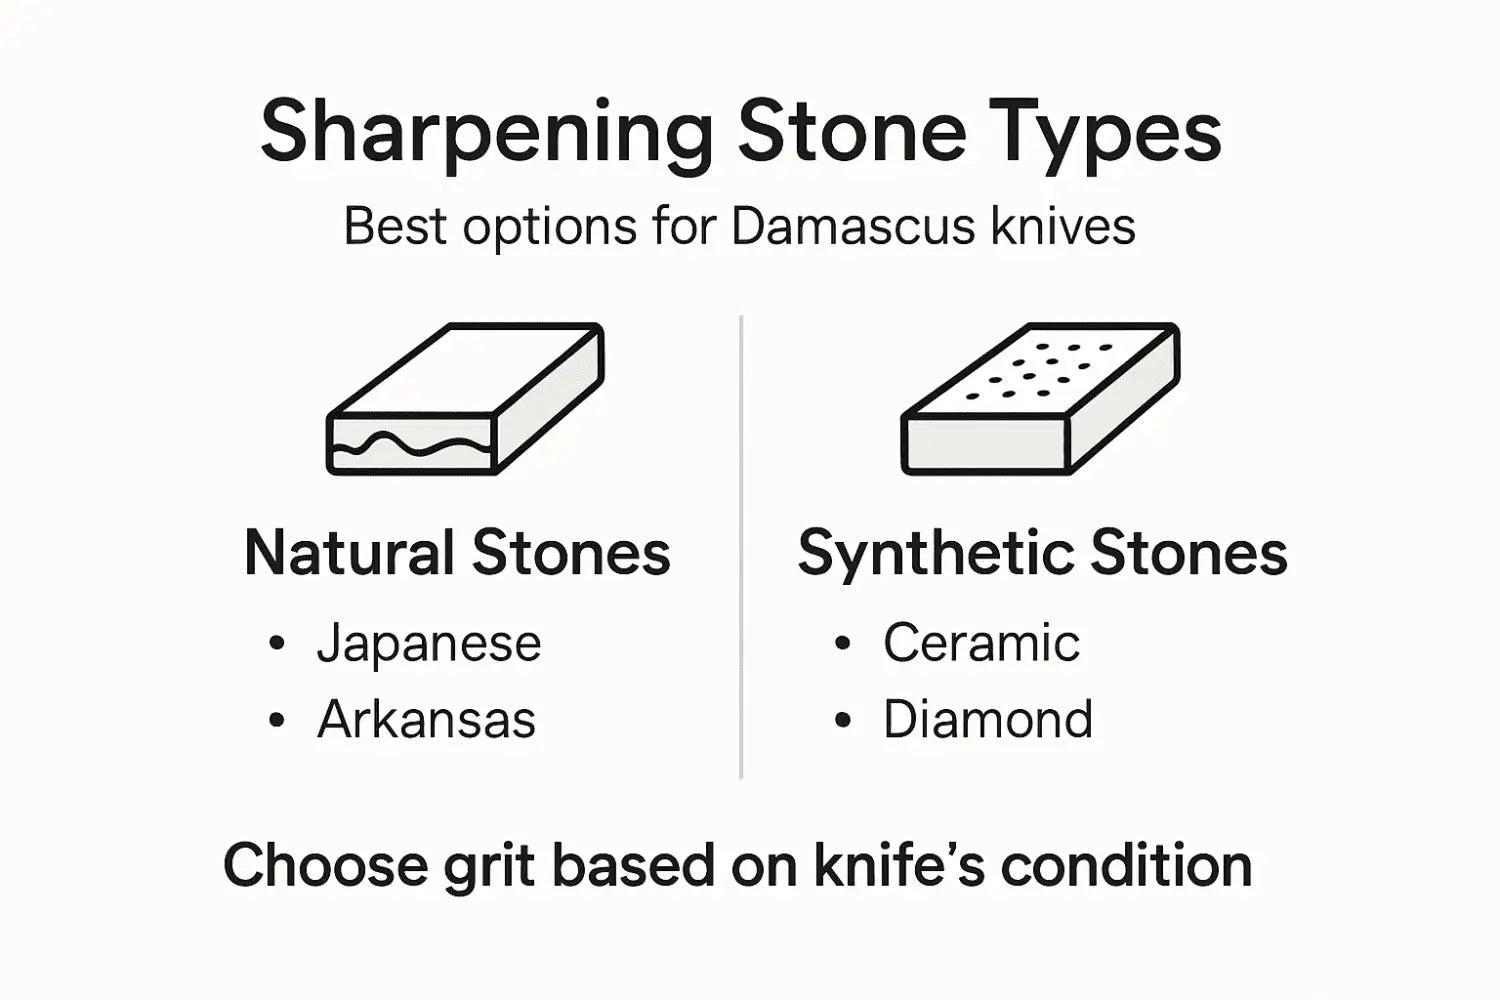
Here’s a comparison of sharpening stone types to help you choose the best for your toolkit:
| Stone Type | Advantages | Drawbacks |
|---|---|---|
| Japanese Natural | Excellent feel, consistent finish | Expensive, delicate, needs care |
| Synthetic | Affordable, long-lasting, reliable results | Less traditional feel, can wear unevenly |
| Combination | Saves space, versatile for most needs | May wear faster, middle-range performance |
| Diamond Plate | Fastest material removal, easy to clean | Can damage Damascus pattern, costly |
Set up your sharpening station in a stable location where you can work without interruption. Your kitchen counter works fine, but a dedicated corner in a knife case or sharpening box keeps everything organized and ready. Store your stones in a dry place since some whetstones absorb water and can crack if they freeze. Keep your strop, honing oil, and angle guide nearby so you’re not hunting for supplies mid-sharpening session.
Pro tip: Invest in a quality 1000/6000 combination stone and an 8000 grit finisher before buying anything else, then add specialty stones only if you find you need them for specific tasks.
Step 2: Prepare Your Damascus Knife Properly
Before your blade touches the whetstone, preparation is everything. Taking five minutes to properly prep your Damascus knife prevents damage and sets you up for a successful sharpening session. A knife that arrives at your sharpening station in the right condition will respond better to your technique and finish with a superior edge.
Start by cleaning your blade thoroughly. Run warm water over the knife and use a soft cloth or sponge to remove any food residue, oils, or dust. Damascus steel shows fingerprints and smudges easily, so a clean blade also lets you see what you’re working with during sharpening. Dry it completely with a lint free cloth. Any moisture left on the blade will interfere with your sharpening stone and can cause rust spots on Damascus steel if left sitting. Once it’s clean and dry, inspect the entire blade edge under good lighting. Look for chips, bent spots, or areas where the edge has rolled over. Understanding exactly what condition your knife is in helps you decide which grit to start with and how much pressure you’ll need to apply.
The blade’s current state determines your starting point. If your Damascus knife has small nicks or the edge is significantly dulled, proper preparation involves removing damage with coarser grits before moving to finer stones. A blade with just minor dulling might only need your medium and fine grits. Handle your knife carefully during this inspection phase so you don’t accidentally cut yourself. Many home cooks make the mistake of rushing through this step, but spending time understanding your blade’s condition now saves time later and prevents wasteful over sharpening.
Position your knife near your sharpening station so you can work without reaching or fumbling for it. Some people like to rest the blade flat on a folded towel so the edge doesn’t contact the counter. This protects both your cutting surface and the blade itself. Your knife should be easily accessible but not in a position where it could roll off your workspace. If you’re using an angle guide, have it ready before you start sharpening. Attach it to the blade or place it where you can reference it quickly. This prep work keeps you focused on the actual sharpening process instead of searching for tools mid session. The entire preparation should take just a few minutes, but it’s the difference between a mediocre sharpening and one that brings your Damascus blade back to performance.
Pro tip: Inspect your blade under bright overhead light to spot damage you might otherwise miss, and always dry your knife completely before sharpening to prevent rust and ensure optimal stone contact.
Step 3: Select the Best Sharpening Angle
The angle at which you hold your blade against the stone is one of the most critical decisions you’ll make during sharpening. Get this right, and your Damascus knife will hold a razor edge for weeks. Get it wrong, and you’ll spend hours sharpening without achieving the performance you want. For Damascus steel specifically, the angle determines whether you end up with a delicate, sharp edge or a durable one that can withstand the demands of professional kitchens.
Understand what angle means before you start. The sharpening angle is measured from the spine of the knife to the stone surface. When you hold your blade at a shallow angle, say 10 degrees, you create an extremely sharp edge that cuts through tomatoes and herbs effortlessly. But that edge is delicate and dulls faster. A steeper angle, around 25 degrees, creates a more durable edge that resists chipping and lasts longer between sharpenings. Damascus steel knives thrive in the middle ground. The sharpening angle significantly influences the sharpness and durability of your edge, and for Damascus blades, experts recommend staying between 15 to 20 degrees per side. This sweet spot gives you both the sharpness Damascus steel is famous for and the edge retention that keeps your knife working hard in the kitchen.
Here is a quick reference for sharpening angle effects on your Damascus knife:
| Angle (Degrees) | Edge Sharpness | Edge Durability | Best For |
|---|---|---|---|
| 10–14 | Extremely sharp | Least durable | Precision slicing |
| 15–20 | Razor sharp | Balanced durability | Daily kitchen use |
| 21–25 | Moderately sharp | Most durable | Heavy chopping |
If you’re new to sharpening, finding the exact angle by feel alone takes practice. This is where an angle guide becomes your best friend. These simple devices attach to your blade and rest on your stone, automatically positioning the knife at the correct angle. Once you’ve used a guide for a few sharpening sessions, your muscle memory takes over and you can work without it. Start each session with the guide, then remove it once you feel confident. Another approach involves the spine touch method. Place both the spine and edge of the blade on the stone, then lift the spine slightly until you feel the edge making contact. This creates roughly a 15 to 17 degree angle for most kitchen knives. It’s not as precise as a guide, but it works well once you develop the feel for it.
Consistency matters more than perfection. If you maintain the same angle throughout your sharpening session, you’ll get excellent results even if that angle isn’t mathematically perfect. Many home cooks obsess over hitting exactly 17 degrees when staying anywhere between 15 to 20 degrees produces outstanding edges on Damascus steel. The real mistake is changing your angle mid stroke or between stones. If you start at 18 degrees on your coarse stone, keep it at 18 degrees on your medium and fine stones. This consistency creates a uniform edge geometry that performs beautifully.
Remember that different parts of your blade may require slight adjustments. The heel near the handle and the tip sometimes need a touch more pressure or a slightly adjusted angle to maintain contact with the stone throughout your entire stroke. Professional sharpeners handle this naturally, rocking the blade slightly during their strokes. As a home cook, focus on maintaining a steady angle and let your technique develop naturally over time. Your Damascus knife will reward your patience with an edge that cuts like nothing else.
Pro tip: Use an angle guide for your first few sharpening sessions to build muscle memory, then transition to free handing once you feel the correct angle intuitively.
Step 4: Use the Sharpening Stone Effectively
Now comes the actual sharpening. This is where your preparation pays off and your Damascus knife transforms from dull to sharp. Using the stone effectively means understanding a few key principles and then letting your body develop the muscle memory that professionals have spent years perfecting. The good news is that you don’t need years of experience to sharpen well. Just a handful of sessions with the right technique will have your blade performing like new.
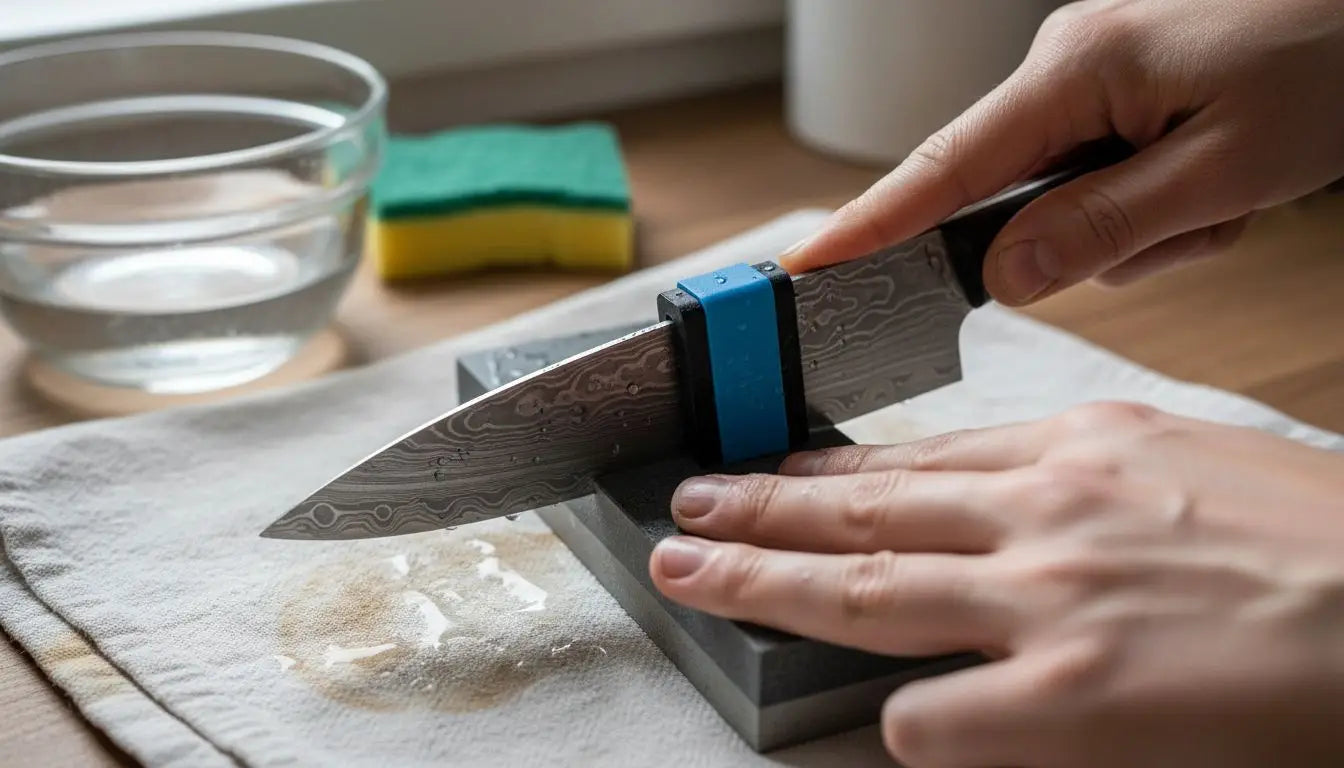
Start by preparing your stone. If you’re using a Japanese water stone, soak it in water for 10 to 15 minutes before sharpening. This saturation allows the stone to cut more effectively and prevents it from drying out during use. Synthetic stones typically don’t require soaking, but check your manufacturer’s instructions. Place your stone on a stable surface or in a sharpening stone holder so it won’t slip during the process. Apply water or honing oil depending on your stone type. This lubrication is crucial because it carries away the metal particles that your blade is releasing, keeping the stone’s surface fresh and active.
Now begin with your coarsest stone. Position your blade at the angle you selected in the previous step, holding the knife so the heel enters the stone first. Apply light but firm pressure, not heavy pressure that strains your arm. The stone does the work, not your muscles. Effective use involves holding the blade at a consistent angle and applying light but firm pressure while moving the blade evenly across the stone from heel to tip. Move the knife forward and away from your body in a single smooth motion, drawing the edge across the stone as you go. This is called a pull stroke. Think of it like you’re trying to slice a thin layer off the top of the stone. Don’t push the blade back toward you while it’s in contact with the stone. Instead, lift it and return to your starting position for the next stroke. Complete 10 to 15 strokes on one side of the blade, then flip and do the same on the other side. This back and forth pattern ensures even sharpening across both sides of the edge.
Watch for a burr to form on the opposite side of the blade from where you’re sharpening. A burr is a tiny roll of metal that indicates you’ve sharpened deeply enough. Once you feel this burr forming along the entire edge, you’re done with that stone. Move to your next finer grit and repeat the process, using 10 to 15 strokes per side again. The burr will continue to develop and eventually disappear as you move through progressively finer stones. By the time you reach your finest grit, the burr vanishes and you’re left with a polished, sharp edge that catches light beautifully.
Maintain the lubrication throughout the entire process. Add more water or oil as needed so the stone stays wet and active. A dry stone glazes over and loses its cutting ability. If you’re doing multiple knives, you might need to flatten your stone occasionally using a stone flattening tool. Over time, whetstones wear unevenly, especially in the center where most people sharpen. A quick flattening restores the surface and keeps your work consistent. For home cooks sharpening Damascus knives regularly, this might mean flattening every few months rather than after every session.
Work deliberately and don’t rush. Each stroke should be a conscious movement where you feel the blade making contact with the stone. This tactile feedback builds your skill faster than racing through strokes mindlessly. Your Damascus steel blade is worth the extra few minutes this takes. You’ll feel the difference when you finally cut through an onion and the knife glides through without crushing the layers.
Pro tip: Use an X pattern when sharpening, alternating sides frequently rather than completing all strokes on one side, which helps develop a burr more evenly across the entire edge.
Step 5: Check and Refine Your Knife’s Edge
You’ve spent time sharpening your Damascus knife on multiple grits, and now it’s time to verify the work and add the final polish. Checking your edge tells you whether you’ve achieved the sharpness you want, and refining it with stropping brings out the full potential of your blade. This is where your knife goes from sharp to exceptional.
Begin by rinsing your blade thoroughly under cool running water. Remove all stone particles and metal dust from the edge and both sides of the blade. Any debris left behind will dull your newly sharpened edge immediately and can scratch the beautiful Damascus pattern. Dry the blade completely with a clean cloth. Now comes the testing. There are several ways to check sharpness, and the most common method is the paper test. Hold a piece of standard printer paper vertically and gently draw your blade downward across the edge. A truly sharp knife will slice the paper cleanly without crushing or tearing it. If the blade catches or skids, you’re not quite there yet. Another option is the thumbnail test. Gently tap the spine of the blade against your thumbnail at roughly a 90 degree angle. A sharp blade will stick slightly and require a small force to slide down your nail. A dull blade will slip off immediately without catching. This test takes practice to master, but many professionals rely on it because it’s quick and accurate. Never use your bare skin for this test unless you’re confident in the blade’s sharpness. The goal is information, not a trip to get stitches.
Once you’ve confirmed sharpness, it’s time to strop. Refining the edge after sharpening involves stropping on leather to polish and align the edge, removing any burrs and bringing out the keenest cutting ability. A leather strop is simply a piece of leather, usually mounted on a handle or board, that realigns the microscopic edge of your blade. Get your strop, some stropping compound if you have it, and prepare for the final touch. Hold the strop firmly on a stable surface or in your non dominant hand. Position your blade spine first against the leather at roughly the same angle you used for sharpening. Draw the knife toward you along the length of the strop, moving from heel to tip. The key difference from sharpening is that you’re pulling the blade toward you and the spine leads rather than the edge. Flip the blade and draw it back along the opposite side of the leather. Complete 10 to 20 passes on each side, alternating sides as you work. The leather is gentle enough that you can’t damage your edge, so don’t worry about technique here. Just focus on making smooth, consistent passes.
After stropping, test your sharpness again with the paper test. You should notice a dramatic improvement in how the blade cuts. The edge feels almost alive, gliding through the paper with minimal resistance. This is the moment when all your effort pays off. Your Damascus knife is now performing at its peak. The pattern gleams under the light, the edge reflects sharply, and the blade cuts like it did when it was brand new. Store your knife carefully after sharpening. A blade guard or magnetic strip keeps the edge from contacting harder surfaces that could dull it immediately. With proper care after sharpening, your Damascus steel knife will maintain this performance for weeks or even months depending on usage.
Pro tip: Test your edge using the paper test before stropping, then test again after stropping to feel the difference that final refinement makes.
Elevate Your Sharpening Experience with Premium Damascus Steel Knives
Sharpening Damascus steel knives requires precision and the right tools to unlock their full potential. If you are aiming for a blade that holds a razor edge longer and delivers exceptional performance, choosing expertly crafted knives designed for optimal sharpening angles and fine finish is essential. Discover how owning superior Damascus knives can reduce your sharpening effort and enhance the pleasure of cooking.

Experience the unmatched sharpness and durability of our Explore Damascus Knives For Precise Cutting - Our Bestsellers collection. Whether you need a versatile Premium Damascus Slicer Collection or a specialized masterpiece from our Premium Damascus Carving Knife Collection, Faneema Cutlery offers artisan-forged tools that retain their edge beautifully and respond perfectly to expert sharpening. Visit Faneema Cutlery now to choose your next kitchen essential and sharpen your culinary skills with confidence.
Frequently Asked Questions
How do I select the right sharpening tools for my Damascus steel knives?
To sharpen Damascus steel knives, start with a combination of a 1000/6000 grit whetstone and an 8000 grit stone for finishing. Gather a leather strop, honing oil or water, and an angle guide to ensure accuracy in your sharpening process.
What is the correct angle for sharpening a Damascus steel knife?
The ideal angle for sharpening a Damascus steel knife is between 15 to 20 degrees per side. Maintain this angle consistently throughout the sharpening process for optimal edge retention and performance.
How can I check if my Damascus knife is sharp enough after sharpening?
To test sharpness, perform the paper test by slicing through a piece of printer paper. A sharp knife will cut cleanly without tearing; if it catches or skids, continue sharpening until it passes this test.
What steps should I take to prepare my Damascus knife for sharpening?
Start by cleaning your blade thoroughly with warm water and a soft cloth, then dry it completely to prevent rust. Inspect the blade for nicks or damage to determine the starting grit for your sharpening session.
How do I effectively use the sharpening stone on my Damascus knife?
Begin with light but firm pressure, moving the blade across the stone in a pull stroke from heel to tip. Alternate sides and complete 10 to 15 strokes on each side until a burr forms, indicating sufficient sharpening before moving to finer grits.
Why is stropping important after sharpening a Damascus steel knife?
Stropping realigns the microscopic edge of your blade and polishes it to enhance sharpness. Complete 10 to 20 passes on a leather strop to achieve a cutting edge that feels effortless during use.
Recommended
- Choosing a selection results in a full page refresh.